
The updated version of the microLCD 3D Printer that is perfect for testing small quantities of photocuring UV resin, quickly and easily.
This new version features:
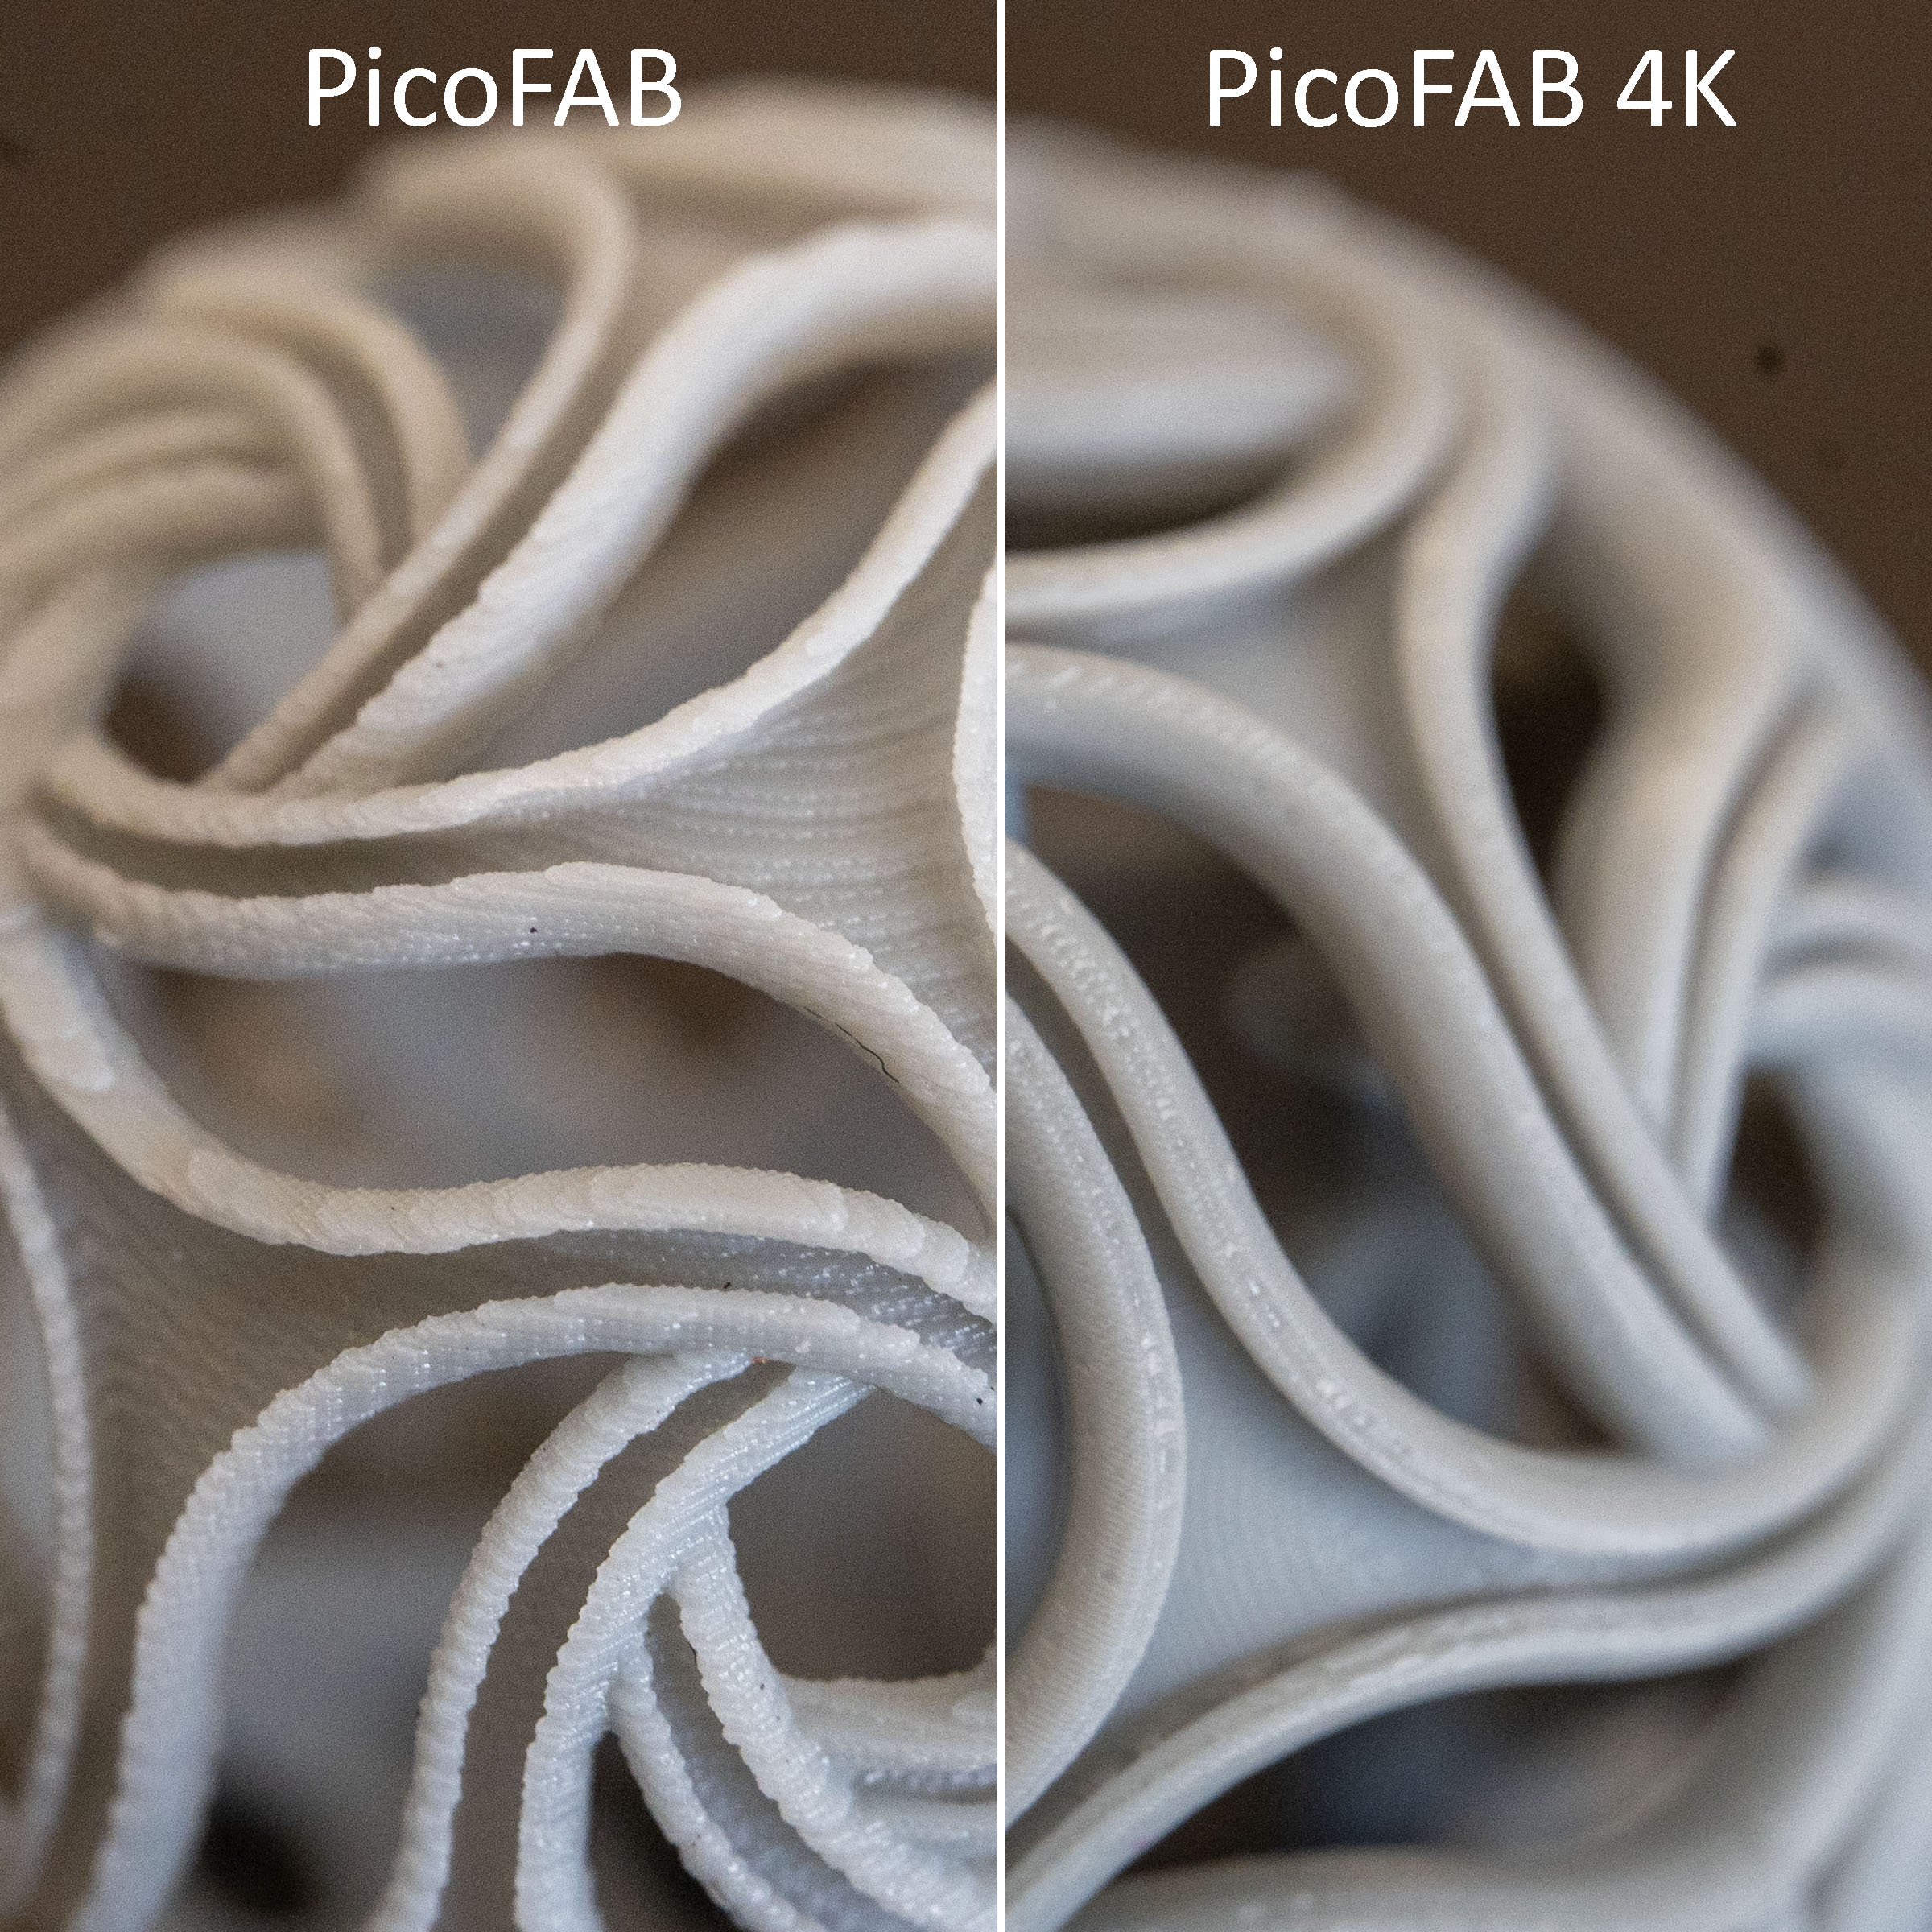
- Monochromatic 4K LCD: 35um XY resolution, with up to 1/3 curing time compared to the PicoFAB
- Customizable Vat size and tray, from 25x25mm downto 15x15mm
- Each Picofab4K is custom made and assembled for each customer


The PicoFAB 4K is the perfect tool for universities, research labs in the development of new materials, bioprinting, and for all those who wish to test small quantities of expensive resins (high performance resin, certified for dental use, castable resins) before to use them for printing on machines of normal dimensions.
FAQ
- Q: What is the XY resolution and printing volume?
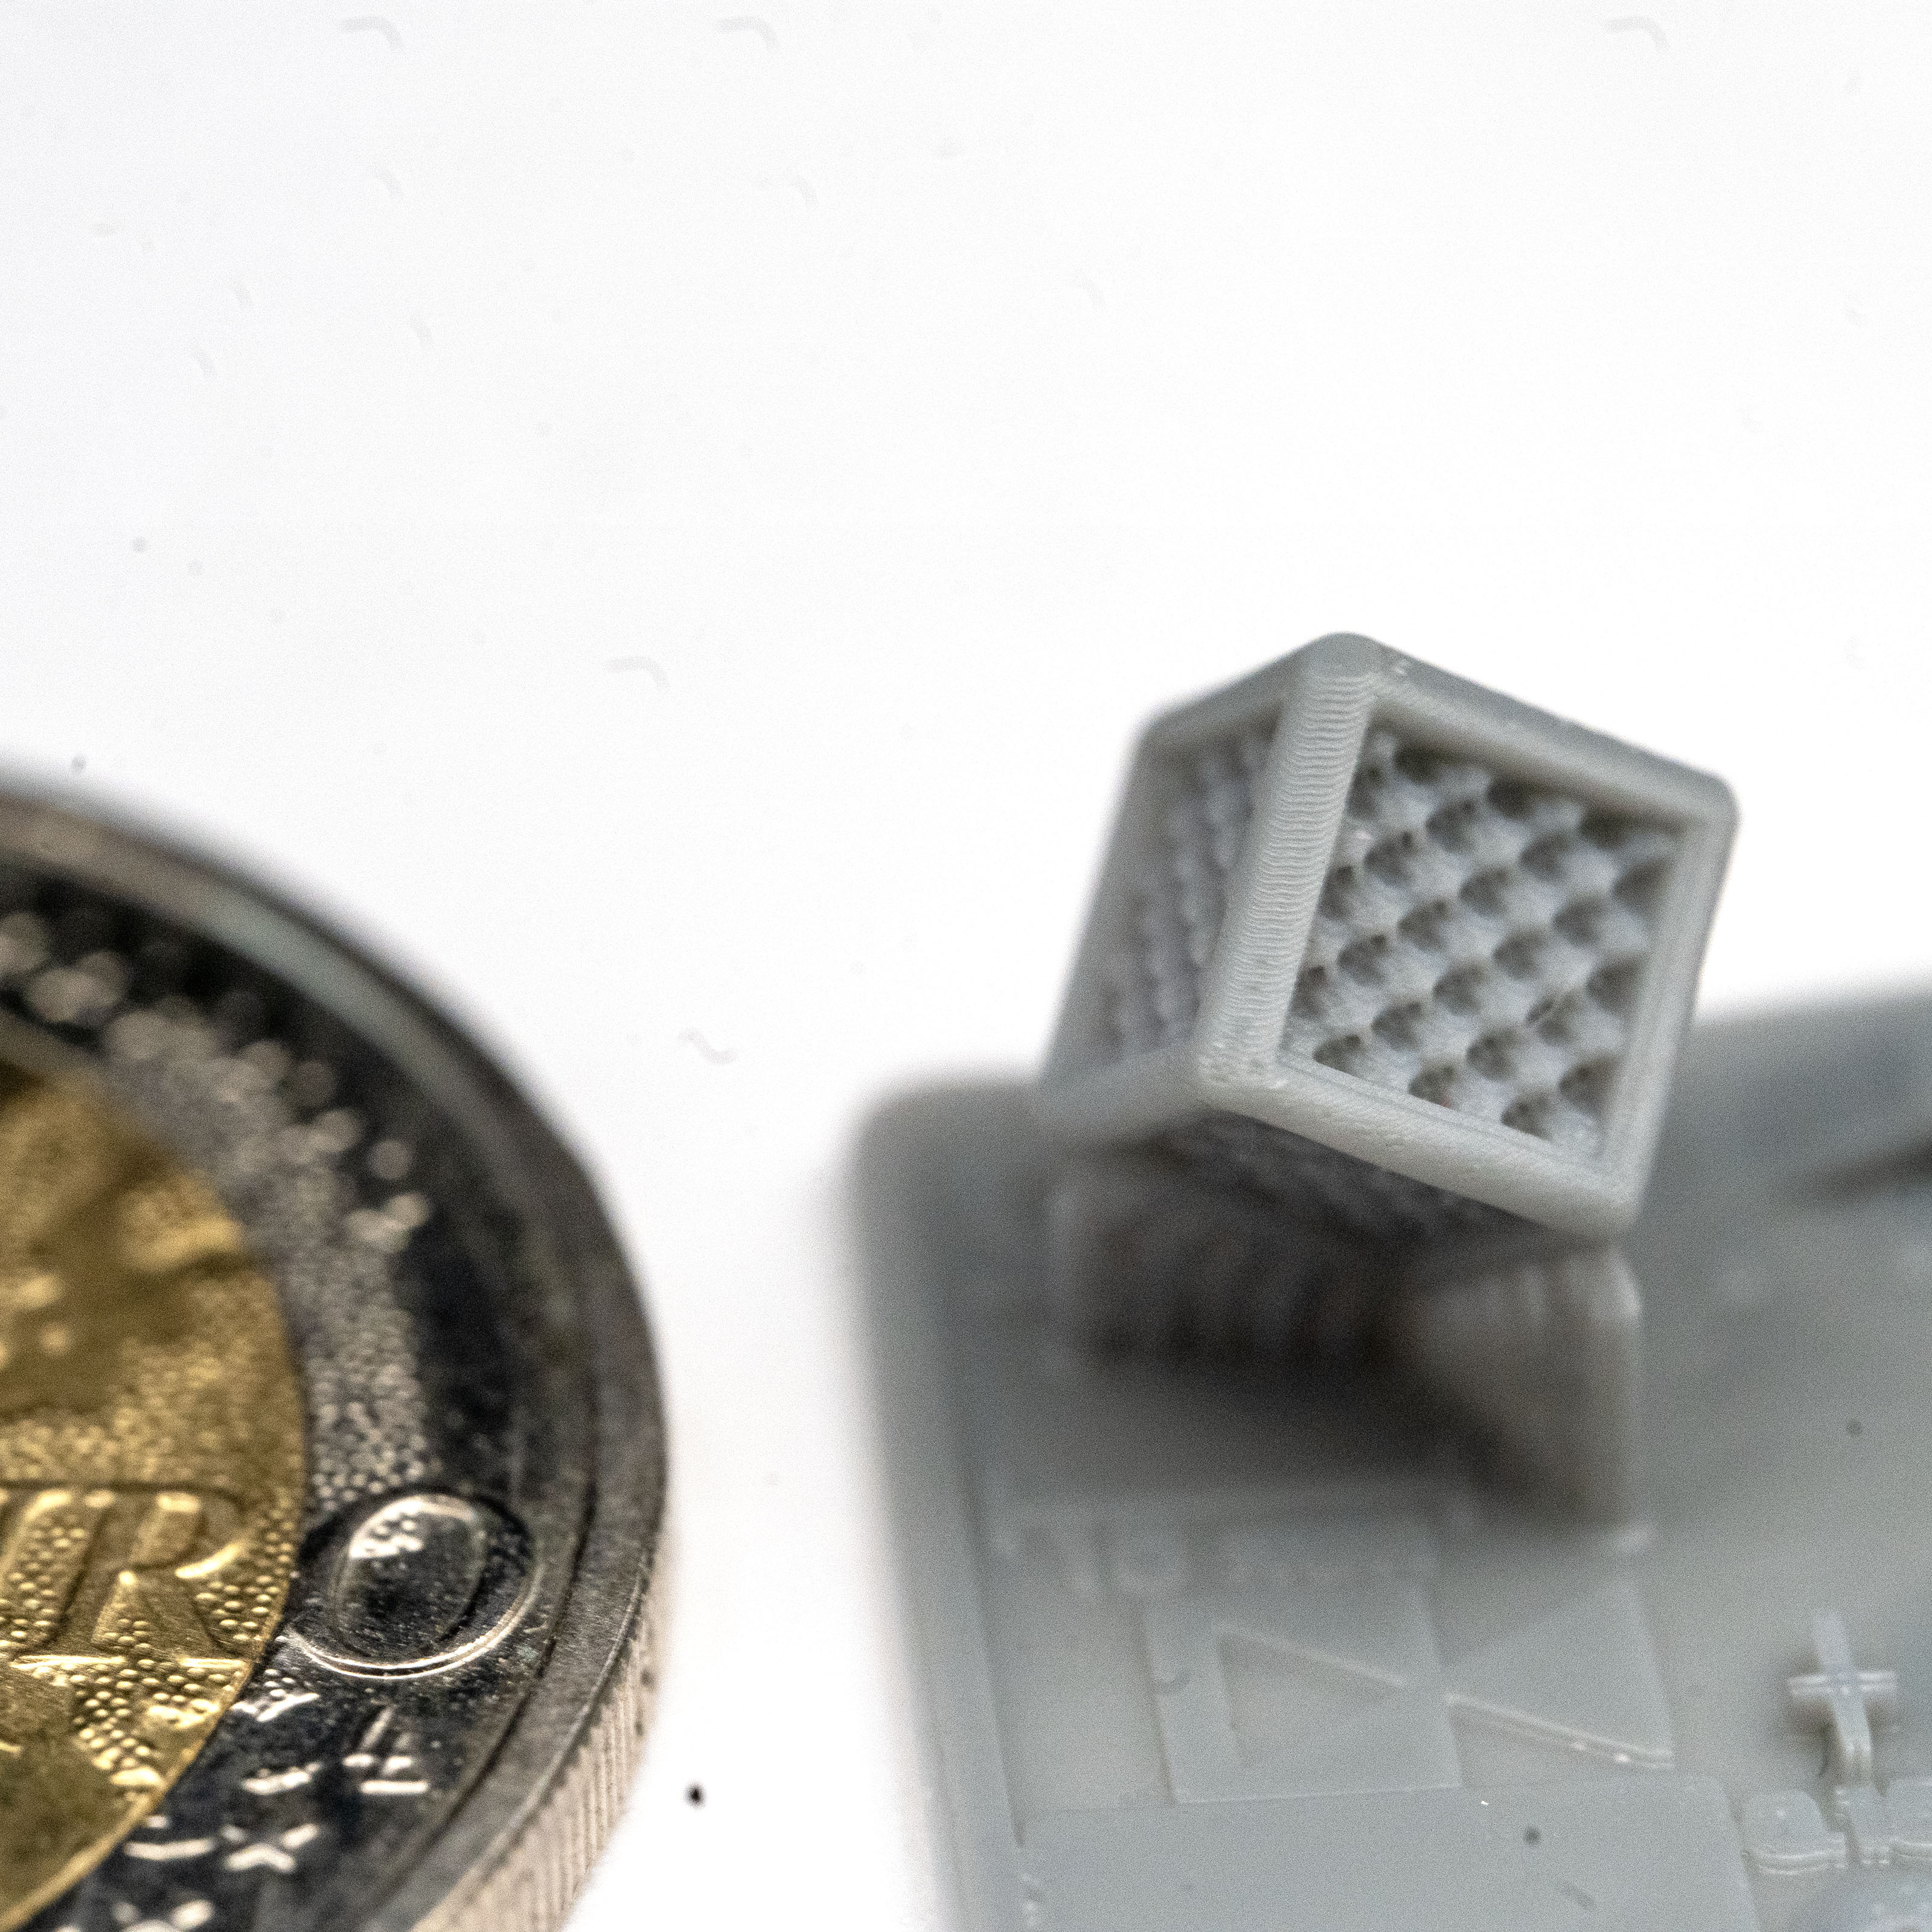
- A: The current resolution is 35µm on XY, so 700×700 pixels on a 24x24mm area.
- Q: What is the intensity measured for each irradiation layer in mW/cm2?
- A: The current version is approx. 3mW / cm2. Custom versions can be made.
- Q: What are the limits of viscosity in which it is recommended to use on the printer?
- A: We have been able to use composites resins with success such as the Liqcreate Composite-X: https://3dsolutions.store/en/prodotto/liqcreate-composite-x-rigid-resin/ , and some Tethon resins.
- Q: What are the minimum and maximum layer thickness that it can be used?
- A: The standard setup is 33µm / 50µm / 100µm per layer (Z resolution).
- Q: Does it exist a specific software (for free or not) to generate the .gcode files for the 3D printer?
- A: We provide free Chitubox profiles for the PicoFAB here


Examples of Composite-X sample parts printed on the PicoFAB 4K (28s curing time, 4 layers; 10-12s curing time). Liqcreate Composite-X is an extremely rigid and high performance reinforced nano-micro composite resin. This material has features like excellent chemical resistance, high strength and high stiffness.
Online manual and settings
You can download the Chitubox profiles here.
The next step is checking the video manuals before printing:
For the first print test, use the 3D file provided on the USB drive, and refer to AM3 Gray resin on the settings file that can be downloaded here
To replace the Fep:
- first, remove the old Fep film form the Vat with scissors or cutter:
- then remove the old tape from the Vat
- next, place 1cm wide double-sided adhesive tape all around the Vat
- place the Fep film as shown in the video
- keeping the Fep tensioned, place 1cm wide adhesive tape around thew Vat to keep the Fep tight
- finally, add the 3d printed tensioning element, or 120mm diam. elastic band wrapped twice around the Vat
- It is very important to check the Fep on the edges of the Vat. To be sure that the Fep is not damaged and the Vat is leak-proof, you can check with resin, or with colored water, placing the Vat filled up to half height, over an A4 sheet of paper. Leavi it for 4-5 hours, then remove the Vat; if you do not see any liquid leaked on the paper, the Vat is fine. To avoid leaks on the printer, never leave the Vat on the printer after a print job, and it is best to remove the resin from the Vat too when not printing.

If your customized PicoFAB 4K supports advanced pause / resume functions, please refer to the following videos: